
Introduction
Delving into the world of culinary delights, coconut oil emerges as a versatile and healthful ingredient that can transform simple ingredients into delectable masterpieces. From the sizzle of sautéed vegetables to the sweet aroma of freshly baked goods, coconut oil recipes offer a unique twist on traditional flavors.
Whether you’re exploring the rich tapestry of Italian pastas, the bold spices of Indian curries, or the comforting warmth of German baked treats, incorporating coconut oil can elevate your cooking and baking repertoire. As we embark on this flavorful journey, let’s discover how coconut oil can infuse a touch of the exotic into your everyday meals and even extend its benefits into your beauty routine.

With its subtle sweetness and impressive health benefits, coconut oil has gained popularity in kitchens and beauty cabinets alike. As Allrecipes showcases, this ingredient is not just for tropical dishes but can be the secret to enhancing a variety of recipes. Whether you’re popping popcorn for a movie night, craving a moist banana bread, or seeking a natural hair mask, coconut oil is your go-to solution.
Let’s dive into some creative and nourishing coconut oil recipes that will inspire your next culinary creation or self-care session.
Coconut Oil Recipes for Cooking
Well, we have a wide range of coconut oil recipes at Go Coconut Oil. You may love to check:
- Breakfast Foods
- Entrees
- Smoothies and Beverages
- Raw Food Goodness
- Traditional Coconut Sweets
- Side Dishes
- Homemade Dressings
- Salads
Coconut Oil Roasted Vegetables
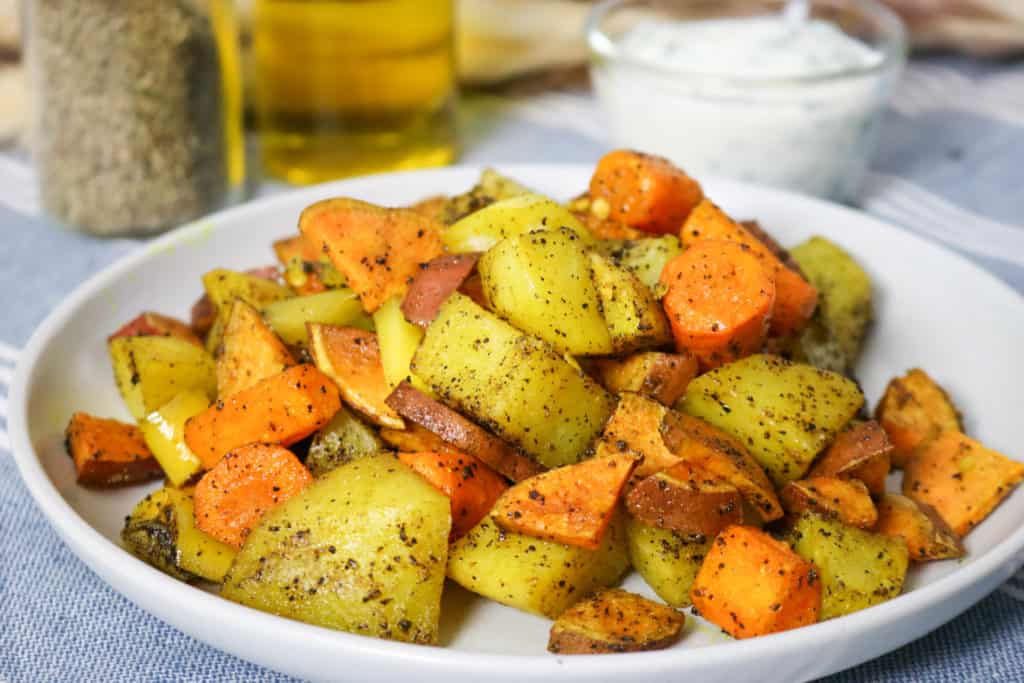
Transform your vegetable side dishes with the rich flavor of coconut oil. Roasting vegetables with coconut oil not only imparts a delightful crispness but also adds a subtle, nutty undertone that enhances the natural flavors of the produce.
Imagine a tray of golden-brown cauliflower, its florets perfectly crispy on the outside and tender on the inside, with coconut oil ensuring the breading adheres just right. The result is a savory, tangy, and slightly sweet sensation that dances on the palate, offering a complexity that is both surprising and satisfying.
Ingredients:
- 4 cups mixed vegetables (e.g., carrots, broccoli, bell peppers, zucchini, sweet potatoes)
- 2 tablespoons melted coconut oil
- 1 teaspoon garlic powder
- 1 teaspoon onion powder
- 1/2 teaspoon paprika
- Salt and pepper to taste
- Fresh herbs (optional, for garnish)
Instructions:
- Preheat the Oven:
- Preheat your oven to 400°F (200°C).
- Prepare Vegetables:
- Wash and chop the mixed vegetables into bite-sized pieces. Ensure uniform sizes for even cooking.
- Coat with Coconut Oil:
- In a large bowl, toss the vegetables with melted coconut oil until evenly coated.
- Seasoning:
- Sprinkle garlic powder, onion powder, paprika, salt, and pepper over the vegetables. Toss again to ensure even distribution of the seasonings.
- Spread on Baking Sheet:
- Spread the seasoned vegetables in a single layer on a baking sheet. Use parchment paper for easy cleanup.
- Roast in the Oven:
- Roast in the preheated oven for 25-30 minutes or until the vegetables are golden brown and tender. You can stir the vegetables halfway through the cooking time for even roasting.
- Garnish (Optional):
- Once out of the oven, garnish with fresh herbs like chopped parsley or thyme for added freshness.
- Serve:
- Transfer the roasted vegetables to a serving dish and serve immediately as a flavorful side dish.
Tips:
- Experiment with different vegetables based on your preference.
- Customize the seasoning to suit your taste, adding herbs or spices like rosemary or cumin.
- If you enjoy a hint of sweetness, consider adding a drizzle of honey or a sprinkle of coconut sugar before roasting.
Whether you’re preparing a simple weeknight dinner or a festive gathering, coconut oil roasted vegetables are a versatile accompaniment to any meal.
Take inspiration from the best apple crumble recipes, where coconut oil creates a gluten-free topping that’s irresistibly crunchy and perfectly spiced with cinnamon and ginger.
It’s these thoughtful touches that make coconut oil recipes a staple for those who appreciate the harmony of health and flavor in their cooking.
Coconut Oil Popcorn
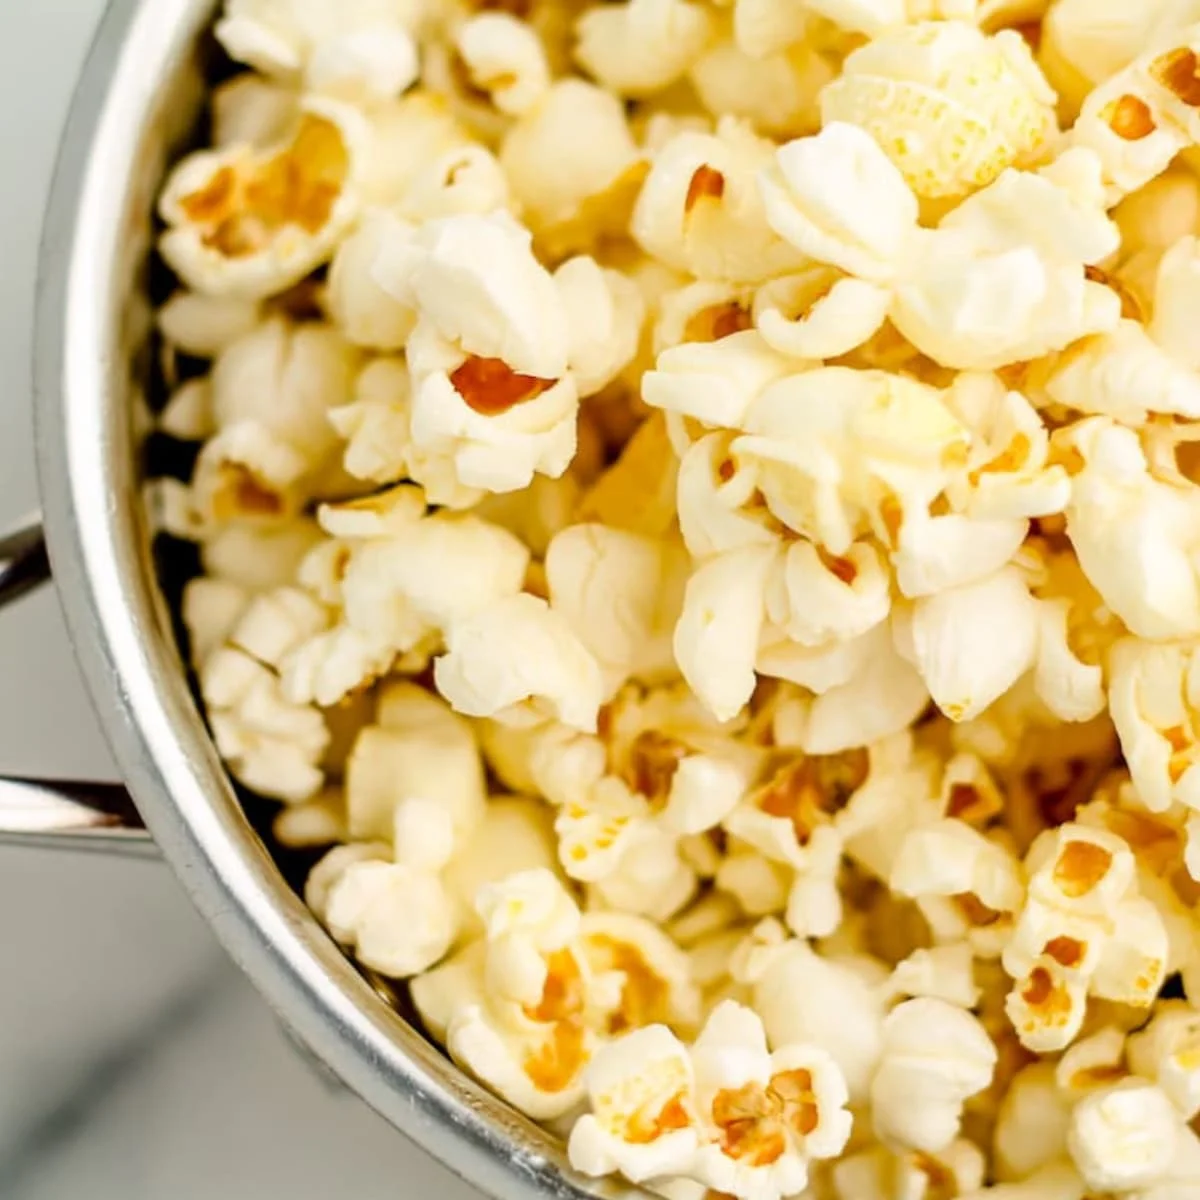
For a snack that’s as fun to make as it is to eat, coconut oil popcorn is a must-try in the realm of coconut oil recipes for cooking. This simple pleasure elevates the classic movie night treat to new heights with its infusion of coconut oil’s subtle sweetness and aroma.
The oil’s high smoke point ensures each kernel pops to perfection, creating fluffy, light popcorn with a hint of tropical essence. It’s a healthier alternative to traditional butter-laden versions, and it’s just as easy to customize with your favorite spices or toppings for a personalized snack experience.
Ingredients:
- 1/2 cup popcorn kernels
- 3 tablespoons coconut oil
- Salt to taste
- Optional: nutritional yeast, herbs, or spices for seasoning
Instructions:
- Preheat the Pot:
- Place a large, heavy-bottomed pot on the stove over medium heat. Add the coconut oil to the pot.
- Add Popcorn Kernels:
- Drop a few popcorn kernels into the pot with the coconut oil. Once these kernels pop, it’s an indication that the oil is hot enough.
- Pop the Remaining Kernels:
- Add the rest of the popcorn kernels to the pot, ensuring they are in a single layer. Cover the pot with a lid.
- Shake the Pot:
- As the popcorn begins to pop, gently shake the pot occasionally to ensure even popping. This helps prevent burning.
- Wait for Popping to Slow Down:
- Continue shaking the pot occasionally until the popping slows down. This usually takes 2-4 minutes.
- Seasoning:
- Once the popping slows down, remove the pot from the heat. Carefully remove the lid, and season the popcorn with salt. You can also get creative and add nutritional yeast, herbs, or spices for extra flavor.
- Toss and Serve:
- Give the popcorn a good toss to ensure even coating with coconut oil and seasoning. Transfer it to a large bowl.
- Enjoy:
- Your Coconut Oil Popcorn is ready to be enjoyed! Serve it immediately for the best taste and crunch.
Tips:
- Use unrefined, virgin coconut oil for a more pronounced coconut flavor.
- Adjust the salt and seasoning according to your taste preferences.
- Experiment with sweet variations by adding a sprinkle of cinnamon or a drizzle of honey after popping.
Whether you’re settling in for a film or looking for a guilt-free nibble, coconut oil popcorn is a crowd-pleaser that’s both satisfying and nutritious. As Bon Appétit notes, coconut oil’s versatility extends beyond the sweet, proving that it can be a star player in savory dishes as well. So grab your favorite bowl, pop in a handful of kernels, and let the enticing aroma of coconut oil popcorn fill your home.
Coconut Oil Granola
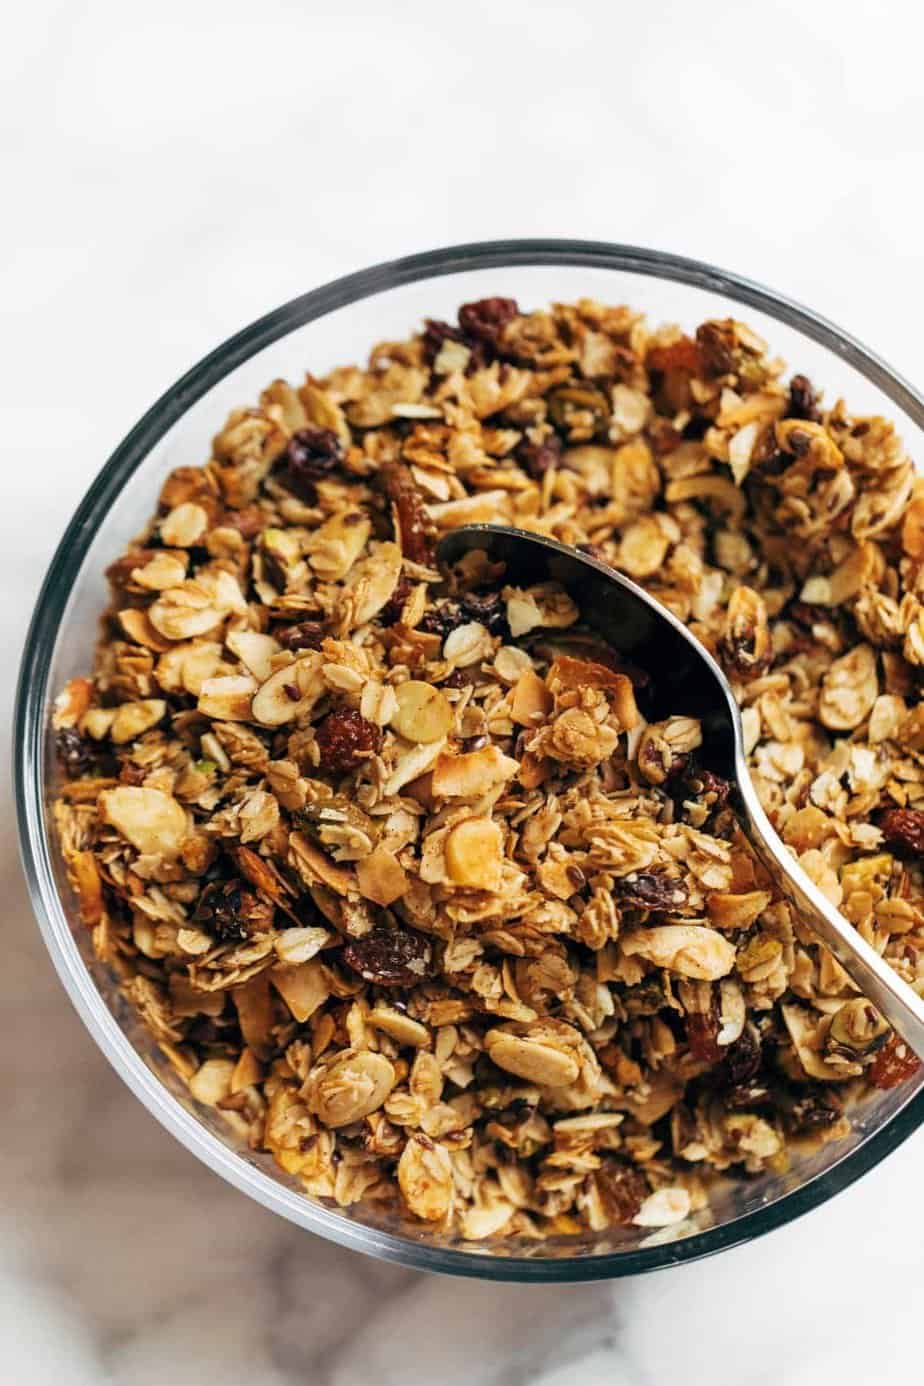
Embrace the wholesome goodness of homemade granola with the added benefit of coconut oil. Crafting your own coconut oil granola means you can enjoy a toasty, nutty flavor that store-bought versions simply can’t match.
The coconut oil not only binds the oats and nuts together but also contributes to a delightful crunch that’s irresistible in every bite. Perfect for a nutritious breakfast or a quick energy-boosting snack, this granola can be studded with dried fruits or dark chocolate chips for an extra layer of flavor and texture.
Ingredients:
- 3 cups old-fashioned oats
- 1 cup nuts and seeds (e.g., almonds, walnuts, sunflower seeds)
- 1/2 cup shredded coconut
- 1/2 cup dried fruit (e.g., raisins, cranberries, chopped apricots)
- 1/2 cup melted coconut oil
- 1/3 cup honey or maple syrup
- 1 teaspoon vanilla extract
- 1/2 teaspoon cinnamon
- 1/4 teaspoon salt
Instructions:
- Preheat the Oven:
- Preheat your oven to 325°F (163°C) and line a baking sheet with parchment paper.
- Mix Dry Ingredients:
- In a large bowl, combine the oats, nuts, seeds, shredded coconut, and salt. Mix well.
- Prepare Wet Ingredients:
- In a separate bowl, whisk together the melted coconut oil, honey or maple syrup, vanilla extract, and cinnamon.
- Combine Wet and Dry Ingredients:
- Pour the wet ingredients over the dry ingredients and stir until the oats and nuts are evenly coated.
- Spread on Baking Sheet:
- Spread the mixture evenly on the prepared baking sheet, pressing it down slightly to create a compact layer.
- Bake:
- Bake in the preheated oven for 20-25 minutes or until the granola is golden brown, stirring halfway through to ensure even baking.
- Add Dried Fruit:
- Remove the granola from the oven and add the dried fruit. Stir to combine.
- Cool Completely:
- Allow the granola to cool completely on the baking sheet. It will continue to crisp up as it cools.
- Break Into Clusters:
- Once cooled, break the granola into clusters of your desired size.
- Store:
- Transfer the Coconut Oil Granola to an airtight container. It can be stored for several weeks.
Serving Suggestions:
- Serve with milk or yogurt for a delicious breakfast.
- Use it as a topping for smoothie bowls or ice cream.
- Pack it into snack-sized bags for a convenient on-the-go treat.
Moreover, coconut oil granola is a versatile staple that can be easily adapted to suit any dietary preference, making it a favorite among health-conscious foodies. As highlighted by A Couple Cooks, incorporating coconut oil into your granola recipe not only enhances the taste but also provides a plant-based source of energy, keeping you fueled for hours.
Serve it over yogurt, blend it into a smoothie bowl, or enjoy it by the handful – however you choose to indulge, coconut oil granola is a delightful treat that nourishes both body and soul.
Coconut Oil Recipes for Baking
For more recipes for baking & dessert, check Baked Goods and Desserts!
Coconut Oil Chocolate Chip Cookies
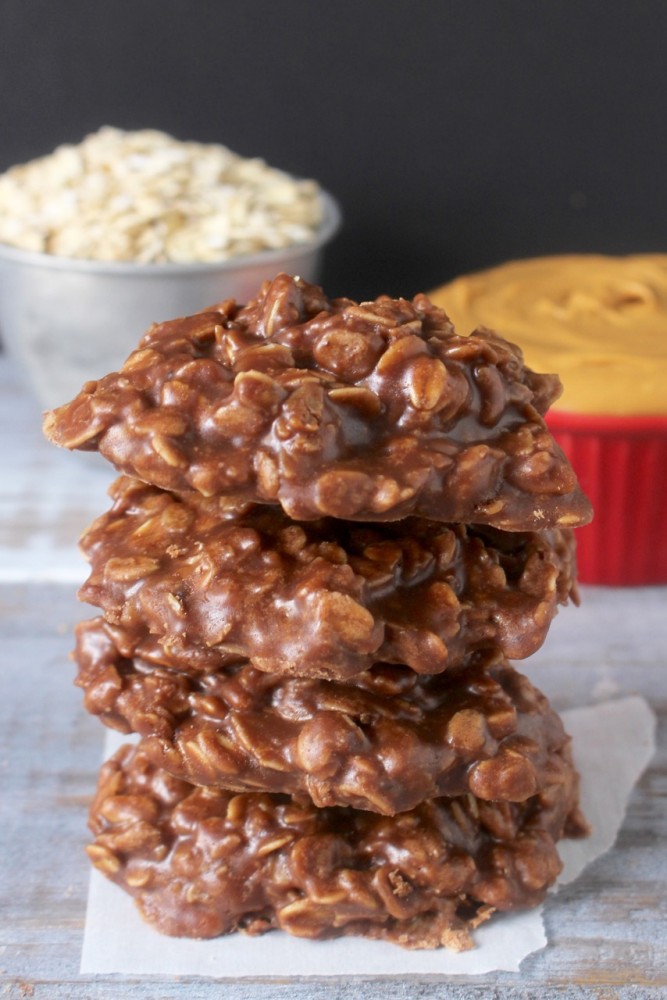
Transitioning into the sweet realm of baking, coconut oil chocolate chip cookies stand out as a delectable alternative to traditional recipes. These cookies offer a chewy texture and a perfect balance of salty-sweet flavor, thanks to the unique combination of coconut oil and other wholesome ingredients.
By using coconut oil, bakers can create a gluten-free treat that doesn’t compromise on taste or texture, as demonstrated by the almond flour-based cookies that have received rave reviews for their delightful chewiness and rich flavor profile.
Ingredients:
- 1 cup all-purpose flour
- 1/2 teaspoon baking soda
- 1/4 teaspoon salt
- 1/2 cup melted coconut oil (cooled slightly)
- 1/2 cup brown sugar, packed
- 1/4 cup granulated sugar
- 1 large egg
- 1 teaspoon vanilla extract
- 1 cup chocolate chips (semi-sweet or dark chocolate)
Instructions:
- Preheat the Oven:
- Preheat your oven to 350°F (175°C). Line a baking sheet with parchment paper.
- Whisk Dry Ingredients:
- In a medium bowl, whisk together the flour, baking soda, and salt. Set aside.
- Combine Wet Ingredients:
- In a large bowl, combine the melted (but cooled) coconut oil, brown sugar, and granulated sugar. Mix until well combined.
- Add Egg and Vanilla:
- Add the egg and vanilla extract to the wet ingredients. Mix until smooth and creamy.
- Combine Wet and Dry Ingredients:
- Gradually add the dry ingredients to the wet ingredients, stirring until just combined. Be careful not to overmix.
- Fold in Chocolate Chips:
- Gently fold in the chocolate chips until evenly distributed throughout the cookie dough.
- Chill the Dough (Optional):
- For thicker cookies, you can chill the dough in the refrigerator for 30 minutes to 1 hour.
- Scoop and Arrange on Baking Sheet:
- Using a cookie scoop or spoon, drop rounded tablespoons of dough onto the prepared baking sheet, leaving some space between each cookie.
- Bake:
- Bake in the preheated oven for 10-12 minutes or until the edges are golden brown. The center may look slightly underbaked, but they will continue to set as they cool.
- Cool on a Wire Rack:
- Allow the cookies to cool on the baking sheet for a few minutes before transferring them to a wire rack to cool completely.
- Enjoy:
- Once cooled, enjoy your Coconut Oil Chocolate Chip Cookies with a glass of milk or your favorite beverage.
Tips:
- Ensure that the coconut oil is melted but not too hot. Allow it to cool slightly before combining it with the other ingredients.
- Experiment with different chocolate chip varieties or add chopped nuts for extra texture.
- Adjust the sugar levels based on your sweetness preference.
Not only do these cookies cater to those with dietary restrictions, but they also provide a healthier option for anyone looking to indulge in a classic dessert with a twist. The use of coconut oil in place of butter introduces a subtle coconut essence that pairs wonderfully with the chocolate chips, creating a cookie that’s as nutritious as it is delicious.
As A Couple Cooks suggests, these coconut oil chocolate chip cookies are a testament to the versatility of coconut oil in baking, proving that better-for-you ingredients can lead to equally satisfying sweets.
Coconut Oil Banana Bread
Continuing the baking journey, coconut oil banana bread emerges as a heartwarming favorite, perfect for breakfast or as a comforting snack. This recipe transforms the classic banana bread by incorporating coconut oil, resulting in a moist and tender crumb that’s rich in flavor.
The natural sweetness of ripe bananas paired with the subtle tropical hint from the coconut oil creates a harmonious blend that elevates this beloved bake. The addition of coconut oil not only enhances the taste but also ensures a dairy-free delight, making it an excellent choice for those following a plant-based diet.
Ingredients:
- 3 ripe bananas, mashed
- 1/2 cup melted coconut oil
- 3/4 cup brown sugar, packed
- 1 teaspoon vanilla extract
- 2 large eggs
- 1 1/2 cups all-purpose flour
- 1 teaspoon baking soda
- 1/2 teaspoon salt
- 1/2 teaspoon ground cinnamon
- 1/2 cup shredded coconut (optional)
- 1/2 cup chopped nuts (e.g., walnuts or pecans, optional)
Instructions:
- Preheat the Oven:
- Preheat your oven to 350°F (175°C). Grease a 9×5-inch (23×13 cm) loaf pan.
- Mash Bananas:
- In a large mixing bowl, mash the ripe bananas with a fork or potato masher until smooth.
- Add Wet Ingredients:
- Add the melted coconut oil, brown sugar, vanilla extract, and eggs to the mashed bananas. Mix until well combined.
- Combine Dry Ingredients:
- In a separate bowl, whisk together the flour, baking soda, salt, and ground cinnamon.
- Combine Wet and Dry Ingredients:
- Gradually add the dry ingredients to the wet ingredients, stirring until just combined. Be careful not to overmix.
- Add Optional Ingredients:
- If using, fold in the shredded coconut and chopped nuts.
- Pour Into Loaf Pan:
- Pour the batter into the prepared loaf pan, spreading it evenly.
- Bake:
- Bake in the preheated oven for 60-70 minutes or until a toothpick inserted into the center comes out clean. If the top is browning too quickly, you can tent it with aluminum foil.
- Cool:
- Allow the banana bread to cool in the pan for about 10 minutes, then transfer it to a wire rack to cool completely.
- Slice and Serve:
- Once cooled, slice and serve your Coconut Oil Banana Bread. Enjoy it on its own or with a spread of butter or cream cheese.
Tips:
- Use extra ripe bananas for a sweeter and more flavorful banana bread.
- If you prefer a nutty texture, add chopped nuts to the batter.
- Customize the recipe by adding chocolate chips, dried fruit, or your favorite mix-ins.
Moreover, the versatility of coconut oil banana bread allows for creative twists, such as adding nuts, chocolate chips, or a streusel topping for added texture and flavor. The result is a delectable loaf that’s both satisfying and nutritious, showcasing the adaptability of coconut oil in baking applications.
Whether enjoyed as a morning treat or an afternoon pick-me-up, coconut oil banana bread is a testament to the simple pleasures of homemade baking, where every slice is a reminder of the comfort that comes from the kitchen.
Coconut Oil Blueberry Muffins
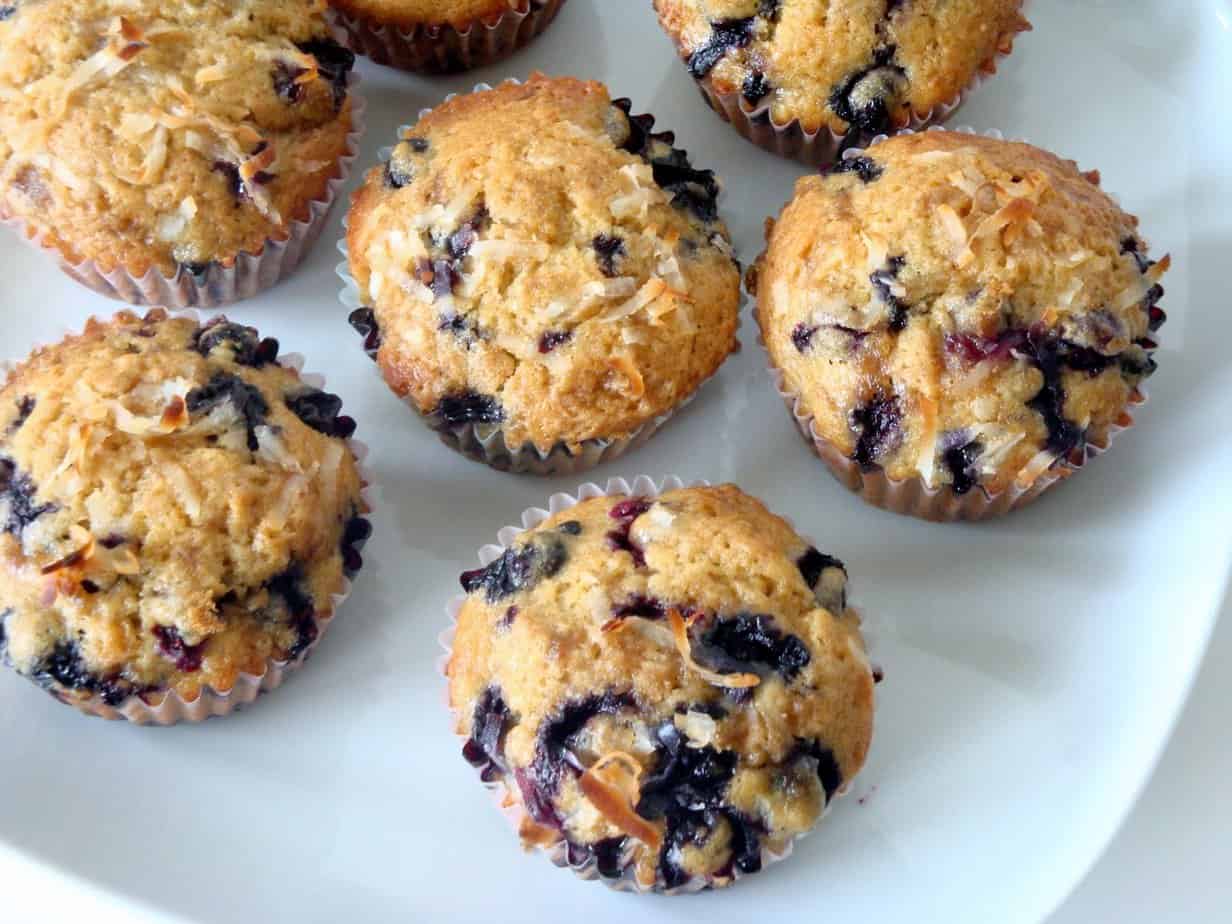
As we delve further into the aromatic world of baked goods, coconut oil blueberry muffins emerge as a delightful treat that perfectly encapsulates the essence of home baking. These muffins are a symphony of flavors, with the natural sweetness of blueberries bursting through the tender crumb, all complemented by the rich, coconut-infused backdrop provided by the coconut oil.
The result is a batch of muffins that are not only moist and fluffy but also packed with antioxidants from the blueberries, making them a healthier option for those seeking indulgence without the guilt.
Ingredients:
- 2 cups all-purpose flour
- 1/2 cup sugar
- 1/4 cup melted coconut oil (cooled slightly)
- 1 cup coconut milk (or any milk of your choice)
- 1 large egg
- 1 teaspoon vanilla extract
- 1 tablespoon baking powder
- 1/2 teaspoon salt
- 1 1/2 cups fresh or frozen blueberries
- Optional: Shredded coconut for topping
Instructions:
- Preheat the Oven:
- Preheat your oven to 375°F (190°C). Line a muffin tin with paper liners or grease the muffin cups.
- Mix Dry Ingredients:
- In a large bowl, whisk together the flour, sugar, baking powder, and salt.
- Combine Wet Ingredients:
- In a separate bowl, mix together the melted coconut oil, coconut milk, egg, and vanilla extract.
- Combine Wet and Dry Ingredients:
- Pour the wet ingredients into the dry ingredients and stir until just combined. Be careful not to overmix; a few lumps are okay.
- Add Blueberries:
- Gently fold in the blueberries until evenly distributed throughout the batter.
- Fill Muffin Cups:
- Spoon the batter into the muffin cups, filling each about 2/3 full.
- Optional Topping:
- Sprinkle a small amount of shredded coconut on top of each muffin, if desired.
- Bake:
- Bake in the preheated oven for 18-20 minutes or until a toothpick inserted into the center comes out clean.
- Cool:
- Allow the muffins to cool in the tin for a few minutes before transferring them to a wire rack to cool completely.
- Serve and Enjoy:
- Once cooled, serve your Coconut Oil Blueberry Muffins and enjoy the tropical twist!
Tips:
- If using frozen blueberries, toss them in a bit of flour before adding to the batter to prevent them from sinking to the bottom.
- Adjust the sugar level to your preference or add a sprinkle of coarse sugar on top for a sweet crunch.
- Experiment with adding a touch of lemon zest for a citrusy flavor.
The beauty of these muffins lies in their simplicity and the ease with which they can be customized. Whether you’re adding a sprinkle of cinnamon or a touch of lemon zest, each variation brings a new dimension to this classic recipe.
And with coconut oil as the star ingredient, these blueberry muffins cater to a wide audience, including those with dietary preferences or restrictions. It’s no wonder that coconut oil recipes for baking, like these blueberry muffins, are gaining popularity for their ability to deliver scrumptious results that are as nourishing as they are satisfying.
Coconut Oil Recipes for Beauty and Skincare
Coconut Oil Hair Mask
Transitioning from the kitchen to the vanity, coconut oil proves its versatility as a key ingredient in beauty and skincare routines, particularly with the luxurious coconut oil hair mask.
This deep conditioning treatment harnesses the nourishing properties of coconut oil to revitalize and strengthen hair, delivering intense moisture and luster to tired, dry locks. The fatty acids in coconut oil penetrate the hair shaft, offering reparative benefits and protecting against environmental stressors.
A DIY coconut oil hair mask can be easily whipped up at home, often with just a few additional natural ingredients such as honey or essential oils, to create a personalized hair care experience.
Ingredients:
- 2 tablespoons melted coconut oil (use extra virgin or unrefined for maximum benefits)
- 1 tablespoon honey (optional, for added moisture)
- 1 teaspoon argan oil (optional, for extra shine)
- 5-10 drops of essential oil (such as lavender or rosemary for fragrance and additional benefits)
Instructions:
- Mix Ingredients:
- In a small bowl, combine the melted coconut oil with honey, argan oil (if using), and essential oil. Stir well to ensure even distribution.
- Prepare Your Hair:
- Before applying the mask, dampen your hair with warm water. This helps open up the hair cuticles and allows better absorption of the oils.
- Application:
- Using your fingers or a brush, apply the coconut oil mixture evenly throughout your hair, focusing on the ends and any areas that are particularly dry or damaged. If you have oily roots, you may want to avoid applying the mask too close to the scalp.
- Massage and Comb:
- Gently massage your scalp to stimulate blood circulation. Then, comb through your hair with a wide-tooth comb to ensure even distribution of the mask.
- Hair Wrap or Shower Cap:
- For better absorption, cover your hair with a shower cap or wrap it in a warm towel. Leave the mask on for at least 30 minutes, or for a more intensive treatment, leave it on overnight.
- Rinse:
- After the desired time, shampoo your hair thoroughly to remove the mask. You may need to shampoo twice to ensure all the oil is washed out.
- Condition (Optional):
- You can follow up with your regular conditioner if needed. However, some may find the hair mask provides enough conditioning on its own.
- Style as Usual:
- Style your hair as usual, and enjoy the softness and shine!
Tips:
- Adjust the quantity of ingredients based on the length and thickness of your hair.
- If you don’t have argan oil, you can use other nourishing oils like olive oil or jojoba oil.
- Perform a patch test with essential oils to ensure you don’t have any allergic reactions.
Regular application of a coconut oil hair mask can transform the hair’s texture and appearance, promoting a silky, smooth mane that radiates health. Users rave about the improved manageability and reduced frizz, making it a go-to remedy for those seeking a natural alternative to commercial hair treatments.
With its impressive conditioning capabilities, a coconut oil hair mask is not just a trend but a sustainable practice for maintaining beautiful, healthy hair.
Coconut Oil Sugar Scrub
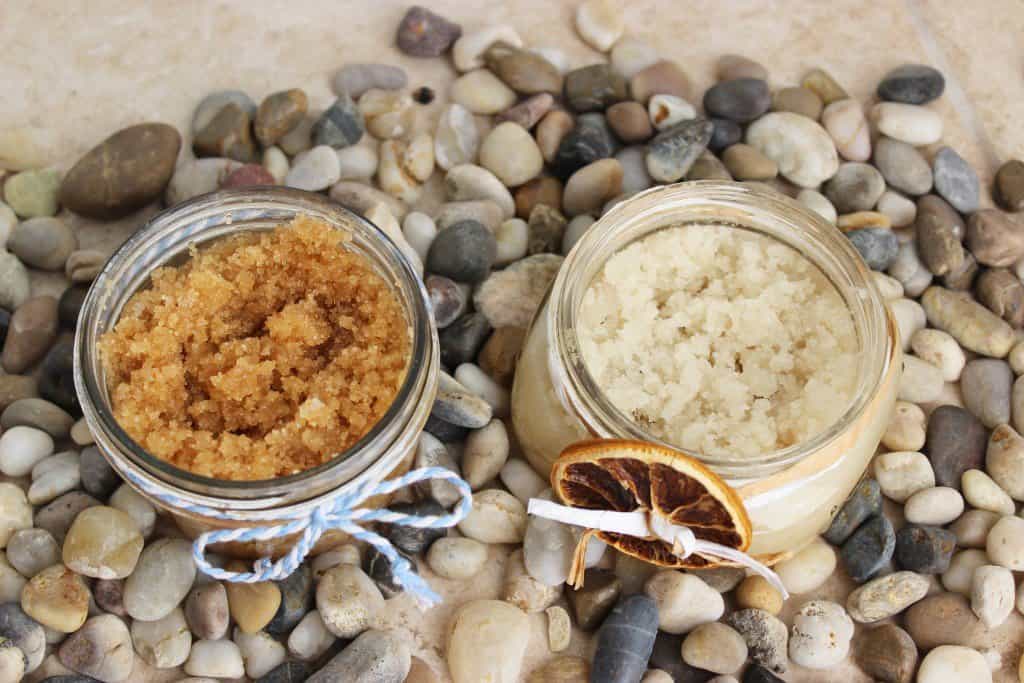
Continuing our exploration of coconut oil’s benefits beyond the kitchen, the coconut oil sugar scrub stands out as a simple yet effective beauty concoction. This homemade exfoliant combines the moisturizing benefits of coconut oil with the natural abrasiveness of sugar to gently remove dead skin cells, revealing a softer, more radiant complexion.
The scrub works wonders on both the face and body, providing a cost-effective and chemical-free option for skincare enthusiasts. Its popularity is owed to the ease of preparation and the immediate, tangible results it offers, leaving skin feeling smooth and rejuvenated after each use.
Ingredients:
- 1/2 cup coconut oil (melted but not hot)
- 1 cup granulated sugar (white or brown)
- 1 teaspoon vanilla extract (optional, for fragrance)
- 5-10 drops of essential oil (such as lavender, peppermint, or citrus for additional scent and benefits)
Instructions:
- Prepare Ingredients:
- If your coconut oil is solid, gently melt it until it becomes a liquid. Allow it to cool slightly, so it’s warm but not hot.
- Mix Ingredients:
- In a bowl, combine the melted coconut oil, granulated sugar, and vanilla extract. Stir well until the sugar is evenly coated with the oil.
- Add Essential Oil:
- Add your chosen essential oil to the mixture. Adjust the number of drops based on your preference for scent strength.
- Stir Well:
- Stir the mixture thoroughly to ensure that all the ingredients are well combined.
- Transfer to Jar:
- Transfer the coconut oil sugar scrub into a clean, airtight jar or container.
- Storage:
- Store the scrub in a cool, dry place. Coconut oil tends to solidify at cooler temperatures, so if the scrub hardens, simply give it a gentle stir.
How to Use:
- Wet Skin:
- Wet your skin in the shower or bath.
- Apply Scrub:
- Take a small amount of the coconut oil sugar scrub and apply it to your skin. Gently massage in a circular motion.
- Rinse:
- Rinse off the scrub with warm water.
- Pat Dry:
- Pat your skin dry with a towel. The coconut oil will leave your skin moisturized, so you may not need to use additional moisturizer.
- Use as Needed:
- Use the scrub 1-2 times per week, depending on your skin’s needs.
Tips:
- Customize the scrub by using brown sugar for a softer exfoliation or white sugar for a coarser scrub.
- Feel free to experiment with different essential oils to create your preferred scent combination.
- This scrub is not only great for the body but can also be used for gentle exfoliation on the lips.
Moreover, the versatility of a coconut oil sugar scrub allows for endless customization. By adding a few drops of essential oils or substituting white sugar with brown for a deeper exfoliation, each batch can be tailored to individual skin needs and preferences.
This DIY beauty staple not only promotes healthier skin but also encourages a moment of self-care, making it a cherished ritual in many skincare routines. As an all-natural, eco-friendly alternative to store-bought scrubs, the coconut oil sugar scrub is a testament to the power of simple ingredients to create luxurious, spa-like experiences at home.
Coconut Oil Lip Balm
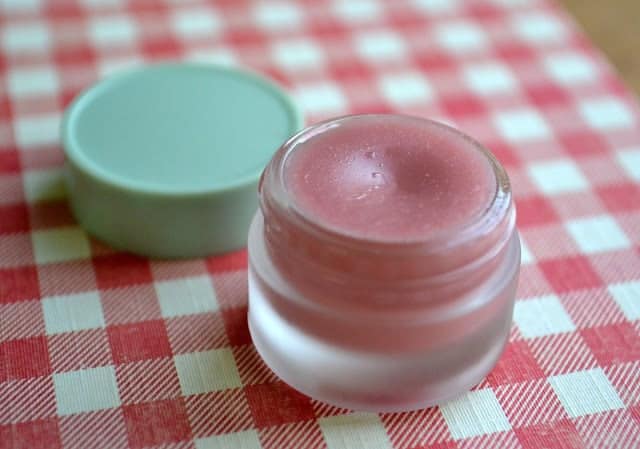
Completing our journey through coconut oil’s multifaceted uses in beauty, the coconut oil lip balm emerges as a must-have for soft, hydrated lips. This all-natural lip care solution leverages coconut oil’s hydrating properties to soothe and repair chapped lips.
Rich in fatty acids and vitamin E, coconut oil provides a protective barrier, locking in moisture for long-lasting comfort. Crafting your own coconut oil lip balm can be a delightful and straightforward process, often involving a blend of coconut oil, beeswax, and a hint of essential oil for flavor.
Ingredients:
- 2 tablespoons coconut oil
- 1 tablespoon beeswax pellets
- 1 tablespoon shea butter
- 5-10 drops of essential oil (such as peppermint, lavender, or vanilla for flavor and fragrance)
- Lip balm containers or small jars
Instructions:
- Prepare Ingredients:
- Measure out the coconut oil, beeswax pellets, and shea butter.
- Melt Ingredients:
- In a double boiler or a heatproof bowl placed over a pot of simmering water, melt the coconut oil, beeswax, and shea butter together. Stir occasionally until everything is fully melted and combined.
- Add Essential Oil:
- Remove the mixture from heat and let it cool slightly. Add your chosen essential oil for flavor and fragrance. Stir well to distribute the essential oil evenly.
- Pour Into Containers:
- Carefully pour the melted mixture into lip balm containers or small jars. Be cautious, as the mixture may be hot.
- Cool and Set:
- Allow the lip balm to cool and set at room temperature. This usually takes a couple of hours.
- Cap and Label:
- Once the lip balm has solidified, cap the containers and, if desired, label them with the flavor or scent.
How to Use:
- Apply the coconut oil lip balm to your lips whenever they feel dry or chapped.
- A little goes a long way, so start with a small amount and add more if needed.
Tips:
- Adjust the amount of beeswax to achieve your preferred lip balm consistency. More beeswax will result in a firmer balm.
- You can experiment with different essential oils or a combination of oils to create unique flavors and scents.
- If you prefer a tinted lip balm, you can add a small amount of natural food coloring or beetroot powder.
Not only does homemade coconut oil lip balm offer a chemical-free alternative to commercial lip products, but it also serves as a pocket-friendly indulgence that can be easily customized to suit personal tastes.
Whether you prefer a hint of peppermint for a refreshing tingle or a touch of lavender for a calming effect, the possibilities are endless. Embracing the use of coconut oil in lip care is a smart choice for those seeking to maintain healthy, supple lips naturally.
For more remedy and skincare tips from coconut oil, make sure you check this category!
Conclusion
In conclusion, coconut oil’s versatility extends far beyond its traditional culinary uses, as showcased by the array of recipes and beauty applications we’ve explored. From enhancing the flavors of roasted vegetables and baked goods to nourishing the skin and lips, coconut oil proves to be an indispensable ingredient in both the kitchen and the beauty cabinet.
Its natural composition and healthful properties make it a preferred choice for those seeking a holistic approach to cooking and skincare. By incorporating coconut oil into your daily routines, you can enjoy the benefits of a natural, sustainable product that caters to a wide range of needs and preferences.
Whether you’re whipping up a batch of coconut oil granola for a nutritious breakfast or mixing a homemade sugar scrub for a spa-like treatment, the potential of coconut oil is boundless. As more individuals embrace the wellness lifestyle, coconut oil stands out as a key component in creating healthier, more conscious habits.
So, go ahead and experiment with the recipes and beauty tips we’ve shared; you might just discover your new favorite way to use this tropical treasure.
Sources:
- https://www.acouplecooks.com/coconut-oil-recipes/
- https://www.allrecipes.com/gallery/savory-coconut-oil-recipes/
- https://www.bonappetit.com/recipes/slideshow/how-to-cook-with-coconut-oil
- https://alldayidreamaboutfood.com/best-coconut-oil-recipes/
- https://www.allrecipes.com/recipes/17569/ingredients/cooking-oils/coconut-oil/
FAQ
What can I cook with coconut oil?
Use coconut oil to sauté the onions and garlic for any recipe. Add a spoonful of coconut oil to the water while cooking rice. Roast vegetables or new potatoes in coconut oil. Use a little coconut oil to sauté fish, shrimp or chicken breasts, or in your stir-fry.
What do you do with coconut oil?
It has a moisturizing effect when applied to the skin. People commonly use coconut oil for eczema and growth in premature infants. It’s also used for psoriasis, obesity, breast cancer, heart disease, MS, and many other conditions, but there is no good scientific evidence to support these uses.
What is the best use of coconut oil?
Coconut oil has a very high saturated fat content, making it one of the best fats for high-heat cooking, including frying. Saturated fats retain their structure when heated to high temperatures, unlike the polyunsaturated fatty acids found in vegetable oils.
What is the most effective way to use coconut oil?
If you’re interested in trying coconut oil, it’s best used in medium-heat cooking such as sautéing or baking. It should be stored at room temperature in the cupboard to keep it pliable. Like most things, coconut oil should be enjoyed in moderation.
Originally posted 2023-11-26 10:27:32.